
Cart
0
5 Essential Steps to Extend Its Lifespan
A wooden cutting board that hasn’t been properly seasoned can lose up to one-third of its potential lifespan. With the right care, however, a quality board can serve your kitchen faithfully for more than ten years.
Imagine unboxing a brand-new wooden cutting board—beautiful grain, solid weight, and a subtle scent of natural wood. But if you start chopping immediately, you may soon notice stains, cracks, or even bacterial buildup.
The fate of your cutting board is often decided within the first hour after opening the package. Will it become a well-aged kitchen companion that grows more beautiful over time—or a disposable item that needs replacing far too soon?
01 Why Seasoning a Wooden Cutting Board Matters
Why shouldn’t a new wooden cutting board be used straight out of the box? Most high-quality boards are kiln-dried before leaving the factory, leaving the wood fibers in a relatively “thirsty” state.
When exposed directly to water or food juices, the board may absorb moisture unevenly. This causes localized swelling, internal stress, and eventually cracking or warping. More importantly, an untreated surface has open pores that easily trap moisture, food residue, and bacteria.
Seasoning is essentially a deep conditioning process. By saturating the wood fibers with food-grade oil, you create a protective barrier that resists moisture, food acids, and bacterial penetration—while maintaining proper internal moisture balance to prevent drying and splitting.
A properly seasoned board develops a soft, natural sheen and a noticeably better cutting feel. The knife meets the surface with just the right amount of grip—protecting the blade while keeping ingredients from slipping.
02 Step One: Thorough Cleaning and Complete Drying
Before seasoning, the cutting board must be absolutely clean. Even if it looks spotless, wood can collect dust and fine debris during transport and storage.
Use warm water (never hot, as it can cause rapid fiber expansion) with a small amount of mild dish soap. Gently clean both sides using a soft sponge or cloth, paying special attention to edges and corners.
After washing, wipe off excess moisture with a clean towel. Stand the board upright in a well-ventilated area and allow it to air-dry naturally. Avoid laying it flat or placing it in direct sunlight, as uneven drying can lead to warping.
Drying typically takes 2–4 hours, depending on humidity and board thickness. A simple test: place your palm on the center of the board—if it feels completely dry and neutral in temperature, it’s ready.
This step is often overlooked but absolutely critical. Applying oil to damp wood prevents proper absorption and significantly reduces the effectiveness of seasoning.
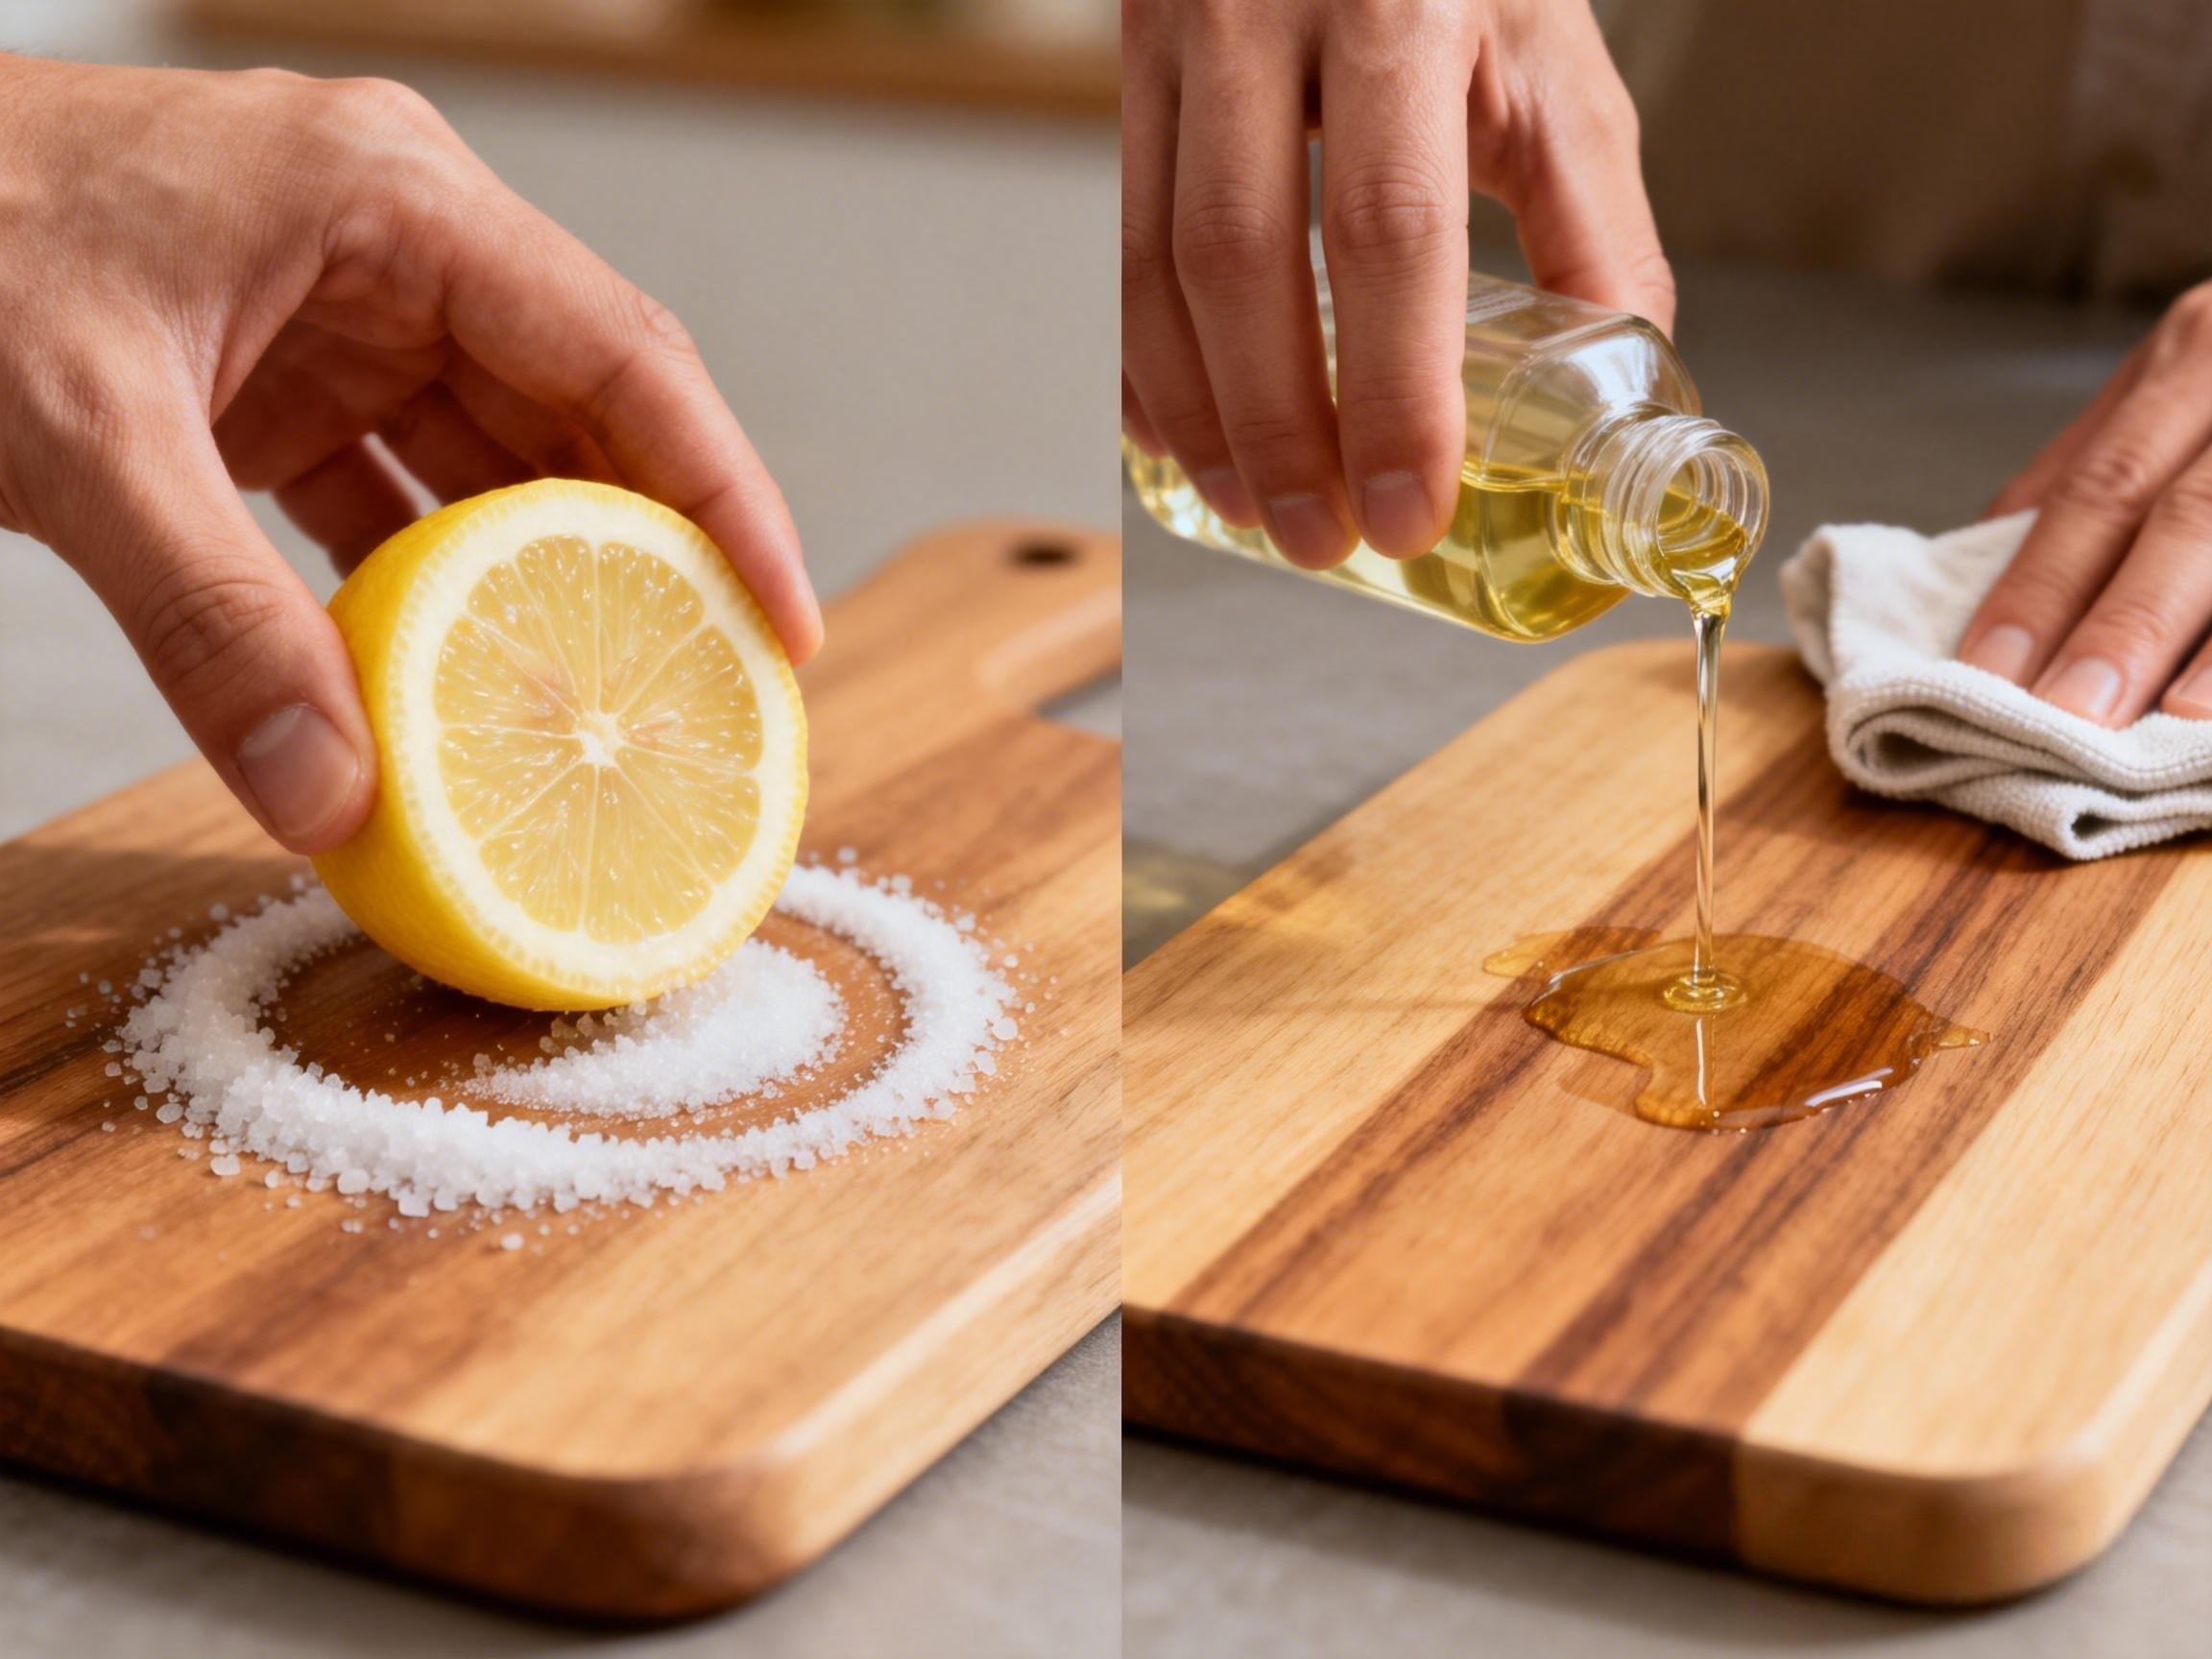
03 Step Two: Choosing the Right Oil
Not all oils marketed for wooden kitchenware are safe or effective. What you need is 100% pure, food-grade mineral oil—odorless, tasteless, and stable over time.
Linseed (flaxseed) oil is sometimes suggested, but it is a drying oil that hardens inside the wood and may eventually make the board brittle. Common cooking oils such as olive or peanut oil contain unsaturated fats that oxidize and turn rancid, producing unpleasant odors.
When selecting oil, look for labels such as food-grade and USP (United States Pharmacopeia) certified. These mineral oils have the right molecular size to penetrate deeply and provide lasting protection.
Pour a small amount of oil onto the center of the board and spread it evenly using a clean, lint-free cloth or paper towel. Apply in circular motions, covering the entire surface—including edges and sides. After the first coat, let the board rest for 15–20 minutes to absorb the oil.
04 Step Three: Deep Saturation and Absorption
After the first coat, you’ll likely notice that the board seems to “drink” the oil—this is normal.
Apply a second, slightly heavier coat, ensuring the surface remains evenly coated. Lay the board flat and allow it to rest for at least 4–6 hours, ideally overnight.
During this time, the oil travels along the wood’s natural grain structure, penetrating deeper layers. Check the edges: if the grain appears darker and more translucent, absorption is happening effectively.
For thicker boards (over 3 cm / 1.2 inches), a third coat is recommended to protect the deeper fibers. When complete, the surface should have a uniform, satin-like finish—smooth and slightly conditioned, but never sticky.
05 Step Four: Remove Excess Oil and Polish
Once the board is fully saturated, some oil may remain on the surface. If left untouched, this excess oil can become sticky and attract dust.
Using a clean, dry, lint-free cloth, buff the surface with moderate pressure until it feels dry to the touch. This step removes excess oil and naturally polishes the wood, enhancing its grain and appearance.
A properly finished board should feel warm and smooth—not greasy. If you notice lingering shine or tackiness after resting, it means too much oil was applied or absorption time was insufficient.
At this point, the board is officially seasoned and ready for use—but its care journey has only begun.
06 Step Five: Build a Simple Maintenance Routine
Seasoning lays the foundation, but regular maintenance ensures long-term performance. After each use, wash the board promptly with warm water and mild detergent, dry it immediately, and store it upright.
Monthly conditioning is essential: once the board is clean and completely dry, apply a thin layer of food-grade mineral oil. Let it sit for 1–2 hours, then wipe away any excess. This replenishes oils lost through washing and cutting, maintaining the protective barrier.
Avoid soaking wooden boards in water or exposing them to extreme heat, such as near ovens or heaters. After cutting high-pigment foods (like beets or carrots) or raw meat, clean the board promptly to prevent staining and bacterial growth.
When the surface becomes heavily scarred or feels dry and rough, lightly sand along the grain using fine sandpaper (220 grit or higher), then reapply oil. The board will look and feel refreshed—almost new again.
After these five steps, your wooden cutting board completes its transformation from raw material to trusted kitchen partner. It becomes more than a tool—it’s a long-term investment that grows smoother, richer, and more personal with time.
Proper seasoning and care are ultimately a dialogue with a natural material. Every oiling and sanding is an act of respect. Years later, when your board remains solid and smooth, you’ll realize these five steps didn’t just extend its lifespan—they quietly wove sustainability into your everyday cooking routine.

